Tampilkan postingan dengan label Dinner. Tampilkan semua postingan

Courgetti Meatballs Recipe

Courgetti Meatballs Recipes

Ingredients

  • 1 teaspoon of balsamic vinegar
  • 400 grams of zucchini
  • 1 clove of garlic
  • 1 tablespoon of olive oil
  • 20 grams of Parmesan cheese
  • 1 bit of pepper
  • 1 bit of rosemary
  • 300 grams of beef meatballs
  • 2 pieces of shallots
  • 1 bit of thyme
  • 390 grams of tomato cubes
  • 1 tsp tomato paste
  • 1 bit of salt


Portions
2 persons
Cooking time
15 minutes

Instructions

  1. Put a tablespoon of olive oil in a pan and place it on the fire.
  2. Add the beefballs and fry them on all sides for 5 minutes.
  3. Meanwhile, finely chop the garlic.
  4. Clean the onion and cut into cubes.
  5. Add the garlic and onion after 5 minutes.
  6. Fry the whole for a few minutes, until the onion is translucent.
  7. Then add the tomato cubes.
  8. Add the tomato puree.
  9. Add the balsamic vinegar, rosemary, thyme, pepper and the salt.
  10. Bring this gently to the boil and let it simmer for a few minutes.
  11. Meanwhile, grate the cheese.
  12. I think it's best to prepare the zucchini shortly in a wok. The goal is really just warming up. Wok it so short.
  13. Divide the courgetti over the plates.
  14. Add the meatballs in tomato sauce.
  15. Garnish the whole with some Parmesan cheese.
  16. Ready is the courgetti meatballs. Enjoy your meal!


About the courgetti meatball recipe

It is said that spaghetti with meatballs (which I have transformed into courgetti meatballs) was an innovation of Italian immigrants from the early 20th century in New York City. The recipe would be published for the first time at the beginning of the last century. The recipe only contains far too few vegetables, hence my adjustment.

Italian writers often mock the dish as pseudo-Italian or non-Italian. I think that some people will turn red if they also see my variant where I replace the pasta with courgetti. Anyway, it's our health and now the dish contains a lot of vegetables. I hope they forgive me.

I use the ready-to-eat courgetti and meatballs. Simply because it saves time. Secretly I think the courgetti that you can make yourself with a spirelli better. Then you get really nice long strings. I choose the ready-made meatballs because they are really tasty and firm. Ideal!
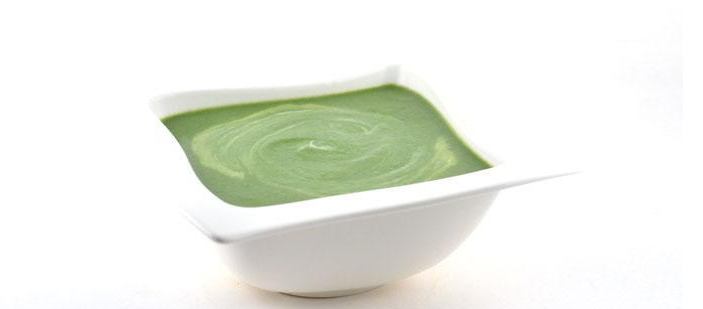
Creamy spinach-zucchini soup

Creamy Spinach-Zucchini Soup

Ingredients

  • 1 piece of zucchini
  • 130 grams of Edamame beans
  • 1 tablespoon of green curry paste Koh Thai
  • 100 ml of coconut milk
  • 1 tablespoon of coconut oil
  • little pepper
  • 2 pieces of shallots
  • 200 grams of spinach
  • 500 ml of water
  • little salt


Portions
2 persons
Cooking time
15 minutes


Instructions

  1. Boil the water first in an electric kettle. This way it is easier to prepare the recipe within 15 minutes.
  2. Put a large pan on the fire and put in the coconut oil.
  3. Meanwhile, clean the shallots and cut them into half-moons.
  4. Put these in the pan and fry the shallots until they are translucent.
  5. Meanwhile, cut the zucchini into cubes.
  6. Add the green curry paste as soon as the shallots have turned translucent.
  7. Add the water directly, along with the zucchini, the Edamame beans and the spinach.
  8. Put a lid on the pan and bring it to the boil and let it simmer for about 5 minutes.
  9. Blend the whole with a hand blender to an even soup.
  10. Add the coconut milk and season the soup with salt and pepper (because you do not have a stock, you may use some salt).
  11. Ready is your creamy spinach courgette soup. Enjoy your meal!


About the creamy spinach-zucchini soup recipe
This creamy spinach-zucchini soup is proof that you can prepare something healthy quickly and that it can also be super tasty
It is really a super-simple recipe. In the picture you can see the ingredients that I used. Only the salt and pepper are not in the picture.

The green curry paste I use is from the Koh Thai brand. I personally think that is a very tasty curry, ideal to give this soup just that extra flavor.

Crispy ginger beef

Crispy Ginger Beef

Ingredients

  • 280 grams of sirloin steak
  • 4 cm ginger
  • 2 tablespoons of honey
  • 1 tablespoon red wine vinegar
  • 2 bags of Saitako miso soup
  • 4 pieces Shanghai paksoi 2 packages

Portions
2 persons
Cooking time
15 minutes

Instructions

  1. Put a large pan of water on the fire.
  2. Cut the fat from the meat and cut the fat into thin strips.
  3. Put a pan with non-stick coating on the fire and fry the fat crispy.
  4. Meanwhile, peel the ginger and cut the ginger into matched strips.
  5. Fry the ginger in the fat until the ginger is crispy.
  6. Cut the meat into cubes.
  7. Hash the cubes through the miso paste.
  8. Remove the fat and the ginger from the pan and set aside.
  9. Fry the meat in the moisture of the fat.
  10. Add the honey and red wine vinegar and let it thicken briefly.
  11. Put the paksoi in the pan with water and blanch for 1 minute.
  12. Drain the water and cut the bok choy in half.
  13. Place the bok choy on the plates and pour the gravy of the meat over it.
  14. Divide the meat over the plates and garnish with the fat and the ginger.
  15. Ready is the crispy ginger beef. Enjoy your meal!


About the crispy ginger beef recipe
This crispy ginger beef recipe is super simple and super tasty! The amount of ginger seems a bit much, but by "frying" the ginger it becomes really very tasteful.

Saitaku miso soup The recipe I "borrowed" from Jamie Oliver and adapted to the diet behind Supersnel Gezond. Now the weather is nicely balanced. Miso-paste is not available in my supermarket, but I also found something on it. Miso paste is a soybean paste with some flavorings. In the store you can buy miso soup from the brand Saitaku. These bags also contain miso-paste. That is why this miso soup is also ideal for use as a marinade for the meat. A simple and super-tasteful solution. You also use some honey and red wine vinegar to flavor the meat. In this way you create an ideal combination between fat, salt and sugar. Ultimate taste experience

Brussels sprouts Italian style with bacon

Brussels Sprouts Italian Style with Bacon

Ingredients

1 grated lemon zest
1 clove of garlic
1 tablespoon of olive oil
3 sprigs of oregano fresh
1 bit of pepper
3 sprigs of rosemary fresh
150 grams of bacon
500 grams sprouts cleaned
2 tablespoons of Taggiasche olives
3 pieces of tomatoes
1 piece of onion
1 bit of salt

Portions
2 persons
Cooking time
15 minutes

Instructions


  1. Clean the onion and cut it into half-moons.
  2. Clean the clove of garlic and chop it fine.
  3. Put a tablespoon of olive oil in a wok.
  4. Add the bacon.
  5. Add the onion.
  6. Add the garlic.
  7. Add the sprouts.
  8. Stir fry the whole well.
  9. Meanwhile cut the tomatoes into cubes.
  10. Add the tomato cubes.
  11. Add the Taggiasche olives.
  12. Pick the leaves of rosemary and oregano from the twigs and finely chop them.
  13. Grate the zest of the lemon and add it to the rosemary and oregano.
  14. Add some salt and pepper and mix it into a kind of spice mix.
  15. Divide the dish over the plates and garnish with the spice mix.
  16. Ready are the sprouts Italian style with bacon! Enjoy your meal!
About the sprouts Italian style with bacon recipe
This sprout recipe, Italian style with bacon, is a concept of my wife. I was home later that night and my wife would take care of the food. Shot in the rose! I came in and it smelled fantastic and it was really great!

Did you think that sprouts used to be so dirty? And do you like them now? This may be because you have come to appreciate them more, but also because of something else. By spreading and further development sprouts have become less bitter in recent years.

The sprout has undergone a major development in the past forty years. An employee of the company Syngenta, which develops the seeds with which it is grown, says that the sprout is more resistant to all weather types, but is also milder in taste. That only succeeded a few years ago.

Creamy Thai cauliflower soup

Creamy Thai Cauliflower Soup Recipe

Ingredients

400 grams of cauliflower the florets
40 grams of cashew nuts
1 bit of chili pepper
1 clove of garlic
100 ml of coconut milk
7.5 grams of coriander
1 bit of lime zest grated peel
1 tablespoon of olive oil
2 pieces of shallots
600 ml of water
1 tablespoon yellow curry paste
1 bit of salt

"Portions
2 persons
Cooking time
15 minutes"

Instructions

  1. First, put the water in the kettle and turn it on.
  2. Put the olive oil in a high pan.
  3. Clean the shallots and cut them into half-moons.
  4. Finely chop the clove of garlic.
  5. Put the shallot and garlic in the pan and fry until the shallot is translucent.
  6. Add the cauliflower.
  7. Add the yellow curry paste.
  8. Add the water.
  9. Put the lid on the pan and bring it to the boil.
  10. Let it cook for about 7-8 minutes.
  11. Add the coconut milk.
  12. Blend the whole into an even soup.
  13. Season it with a little salt, chili pepper, and lime zest.
  14. Finely chop the coriander and stir the main part through the soup.
  15. Spread the creamy Thai cauliflower soup over the bowls.
  16. Garnish with the cashew nuts and the leftover coriander.
  17. Ready is creamy Thai cauliflower soup. Enjoy your meal!


About the creamy Thai cauliflower soup recipe
This creamy Thai cauliflower soup is again such a deliciously simple and super tasty dish. The secret ingredient is the zest of lime or grated lime zest. That really gives this soup a refreshing boost.

Creamy Thai cauliflower soup consciously chooses only 100 ml of coconut milk. There is 200 ml in the package. Not that I am so afraid of extra calories, but I always pay attention to the total amount of saturated fat. Saturated fat is not unhealthy, but wherever you stand it is. However, there is a lot of confusion lately. For this see the article Saturated fat healthy ?. In short, do not use the whole suite for 2 people. The olive oil and cashew nuts also contain some saturated fat and enough is enough. The rest no longer contains saturated fat, so you stay well within the maximum recommended amount.

Low-Carbohydrate Sushi 

Sushi Recipe
Low-Carbohydrate Sushi


Ingredients

  • 1 piece of avocados
  • 400 grams of cauliflower rice
  • 200 grams of hüttenkäse
  • 1 piece of cucumber
  • 2 teaspoons of horseradish
  • 5 pieces of nori leaves
  • 1 bit of soy sauce
  • 1 tablespoon of fish sauce
  • 250 grams of warm smoked salmon fillet
  • 1 bit of wasabi
For Portions: 2

Instructions

  1. We first make the sticky rice. Either, sticky rice.
  2. Mix the cauliflower rice with the cottage cheese, horseradish and fish sauce. Stir well until the cauliflower rice has really become a sticky rice.
  3. Cut the avocado in half and remove the kernel.
  4. Cut the flesh in the peel into a grid and spoon the pulp from the peel. Set this aside.
  5. Cut the cucumber in half and then cut the cucumber into thin long strips.
  6. Pull the salmon apart so that you get loose pieces of salmon and put this aside as well.
  7. Place a sheet of nori with the rough can up on a bamboo mat.
  8. Spread a layer of cauliflower rice evenly on the nori- mal and leave 7 cm at the top.
  9. Place the salmon, avocado and cucumber in the middle of the cauliflower rice.
  10. Roll the noril carefully with the bamboo mat away from the body and press the filling in the middle.
  11. Moisten the free part of the nori- mal with water and firmly tighten the roll.
  12. Remove the roll of the bamboo mat and cut it with a lightly moistened sharp knife into 5-6 pieces.
  13. Repeat this until you have cut a total of 5 rolls into pieces.
  14. Serve the low-carbohydrate sushi a little wasabi and soy sauce.
  15. Ready is the low-carbohydrate sushi! Enjoy your meal!

About the low-carbohydrate sushi recipe

Yes! Finally I had the good inspiration for a brilliant low-carbohydrate sushi. In other words, futomaki. Futomaki is a somewhat thicker roll of about four centimeters that, apart from rice, often has three different fillings.

The challenge was: how to make sushi rice based on cauliflower rice. Cauliflower rice does not stick so well itself. I got the idea because I wanted to make another dish with salmon. Salmon tastes great with, for example, some cottage cheese, a little dill and some horseradish. So I was playing around a bit. Some avocado and some cucumber there ... Maybe another sushi bowl. Suddenly the penny fell. If I mix hüttenkäse with cauliflower rice, then I have sticky rice, or sushi rice. Sushi rice is sweetened with sugar and hüttenkäse also has something sweet. To make the taste more Asian, I dropped the dill and chose the horseradish and the fish sauce. Perfect basis for the low-carbohydrate sushi!

Low-carbohydrate sushi 2From now you can of course vary endlessly. I chose the warm smoked salmon nuts. They are nice and high on taste and a bit greasy. Some avocado for the creamy effect and some cucumber for the fresh final touch.
5 Tips: Avoid over-eating during holiday dinner

It all sounds somewhat contradictory after reading the title of this article, but before I start on how to avoid overeating: do not forget to enjoy during the holiday dinner. It's party time, you're with family, there is plenty and abundant food; that is something to appreciate and be grateful for. But we also want to experience healthy and as many holiday dinners, so we want to be obese after a holiday dinner. Right?

1. Don't make yourself Hunger 
Prevent you start with dire pull the holiday dinner. It is tempting to think that it helps to eat all day little to nothing so you can go wild at dinner, but it is counterproductive. You're probably so starved that you poured directly on the nuts and snacks, so you already have a meal in before dinner is well and truly begun. Rather eat two to three hours before the dinner starts some yoghurt (protein) with fruits and nuts (fats), or a small salad with chickpeas (protein) and smoked chicken (more protein). Proteins and fats saturate longer than carbohydrates (so eat rather not fruit or a slice of bread with jam) and thereby ensure that you sit down without great appetite for holiday dinner. Which is convenient, because it helps you in the following the following tips!

2. Small portions 
Choose small portions at bragging. Not only makes sure you can taste more different things and you do not stuffing, but you eat slower. Just be careful that you do not create three times your plate full with small portions, because then you eat net obviously still far too many. Personally I like the rule that I like best my board still must create a second full time (hello, hey it's holiday!), But that I third time skip so I enough space on hold for a dessert.

3. Eat more green 
vegetables, salads - fill your plate with that. A very simple measure: the more colorful looks like your plate, the healthier it is. Scoop therefore primarily on several salads or vegetable dishes so that fill 2/3 of your plate. Let meat, poultry or fish with potato or rice dishes fill the remaining space on your plate.

4. Sports day 
course you want your hours of toil in the cook, socialize with the family or playing games. However, try to do during the day as exercise, preferably outdoors. Take a brisk walk, take the bike to get some last minute shopping, go a little run or swim in the gym. You put the burning as it were 'on'; see it as the engine of your body is going to work. And that's fine, because you're going to give your body a lot of fuel in the evening!

5. Drink
No, not just champagne. Make sure you get enough water! Drink a large glass of water before eating and grab at dinner not just your wine glass, but as well for your water glass. A useful measure: try to drink a glass of wine each as big glass of water. So in total you drink less alcohol, enter to get inside your stomach without extra calories and - last but not least - you ensure that you get less drunk. And that in turn helps to prevent cravings. So you this year while clearing the dinner in the kitchen yet the scale of the tiramisu is to lick (yup, I've been there), or secretly move the leftovers inside which should be tomorrow's dinner. 
Arabic rice (Kabsa) with chicken, almonds and raisins in Syria

Let's continue to look beyond our own borders. After the Afghan soup with lentils from last week I namely a recipe that a country that today only the word "refugee" evokes, but it has much more to offer:. Syria  Guest Chef Azad from Syria made ​​"Kabsa" for Marley Spoon: Arabic rice with chicken, almonds and raisins. A little fresh coriander, toasted almonds into the rice - it's the little details that not do it.


Preparation:

1. First make the sauce.

Vegetables in a frying pan the onion and garlic in a little olive oil.

Add after four minutes the diced chicken, carrots, tomatoes and tomato paste. Allow at least five minutes. Add the water afterwards, along with the cinnamon stick and cloves. Allow 20 minutes to simmer and thicken over medium heat so that it more like a thick sauce than soup is.


2. Make the rice while the sauce is simmering.

Apply 300 milliliters of water to the boil and add the rice to it. Bring back to the boil and cook for 10-12 minutes. Then turn off the heat and let the rice stand for 5 minutes with the lid on the pan - you now have if the property is no longer pouring out.

Bake in the meantime the almonds until golden brown in a frying pan - you do not need oil. Beware: it can suddenly go fast!

Stir in the raisins into the rice along with the almonds.

Serve the rice with the sauce and maybe some fresh coriander.

Bon appetit!
Dinner recipe: Pheasant from the oven with oyster mushrooms, garlic and truffle butter

Wild is an excellent choice for your dinner. Wild sounds complicated, and I can not make it much better than it is, it is also more complicated than baking an egg. But on the other hand it is not so difficult that you have to be a chef for it. This recipe is, incidentally, to a chef Ben Tish Restaurant Ember Yard in Berwick Street in Soho, London. He makes these roasted pheasant on the barbecue, I'll do him nicely in the oven. Saves a lot of hassle with coal and air thermometers.

This recipe is suitable as a main dish for eight people. Wild dries out quickly because it is such lean meat, but by salting it and grease (tip of the chef!), You're guaranteed a moist and tender piece of pheasant. Instead of pheasant you can actually use a fine (small) chicken - which are around the Christmas period even just get at most supermarkets.

Preparation;

1. Brine
Make first the brine, by dissolving the salt in the water. Let the pheasants 2 and a half-hour soak in the brine.

2. Truffle Butter
Please  fix the truffle butter in the meantime: melt the butter in a pan (or make him soft anyway) and stir in the truffle oil and fresh truffle possibly through. Put the butter, then put in a bowl in the refrigerator, so that it becomes hard again.

3. Pheasant
Dep  pheasants after the 2.5 hour brining dry with paper towels or a cloth.

Season the pheasant with salt, pepper and olive oil.

Divide the slices of pancetta on a baking dish. This fold you later for the pheasants it (the pancetta, not the dish).

Spread a tablespoon of truffle butter over the pheasant and place each pheasant breast side down in the baking dish on top of the pancettaplakjes.

Fold the slices of pancetta around the pheasants around. It's a little tinkering, but using the butter and some kneading and pushing with your hands pancetta remains if the property is reasonably sit.

Divide  there are some truffle butter; the more the better.

Place the pheasant in the refrigerator for 20 minutes so that they are firm and the pancetta stay in place.

Preheat  the oven at the end of these 20 minutes, fixed at 170 degrees Celsius.

Remove  the baking dish with the pheasants from the refrigerator, and cook them first 25 minutes on their backs in the preheated oven (even turn around so when you pull them out of the fridge!).

Turn the pheasants after 25 minutes to the chest side.

Bake  for 5 minutes and then check with a meat thermometer in the thickest part of the pheasant (in the thigh) and the core temperature is 60 degrees. If that is not the case, so the pheasants late than 5 minutes longer in the oven.

Remove the pheasant from the oven and let them rest for 10 minutes. Spread some more truffle butter over the pheasants (but beware: keep some truffle butter over the mushrooms!).

4. Garnish 
Make  the topping: Cut the mushrooms into large chunks and set aside.

Fry  the mushrooms briefly with the remaining truffle butter (1-2 tablespoons) in a saucepan until they dwindle. Then add the garlic and fry for 2-3 minutes on high heat, until the garlic is golden.

Remove the pan with the mushrooms from heat and spread it over the pheasants. The extra butter ensures that the pheasants stay nice and juicy.

Serve the pheasants on a beautiful plate with the melted butter, oyster mushrooms and garlic and enjoy!
Green smoothie with orange and cranberry juice

Even after all those bulging new year dinners? Create a crackling healthy smoothie! This vitaminebom I made for myself and a friend who suffer from bladder infection so I used cranberry juice, because it seems to help against cystitis / chronic plasseritis. I just used cranberry juice from the supermarket, so full of sugar. Yeah sorry, I did not feel in order to cycle to the Nature Shop / Marqt / vega shop. But that does not detract from the fact that this smoothie is good for the resistance, because you get a lot of fruits and vegetables in one go!

This recipe makes three portions. Tip: freeze the portions that do not directly drink it immediately, so that all the nutrients are preserved. Under the influence of light and oxygen going vitamins break down, so make sure you store your smoothie light- and airtight!

Preparation;

Mix all ingredients in a blender.

Garnish with cocoa nibs and possibly some sunflower seeds and pumpkin seeds. Bon appetit!

Personally, I like to eat it with a handful of roasted almonds (but well, I am now also a practical toasted almonds) and a cheese sandwich.
Vegan Afghan vegetable soup (havij) with lentils and fresh herbs

What some people see as a threat, I personally see as an enrichment of our culture.  You can be afraid of refugees from Syria, Afghanistan and Pakistan, but you can also open to other cultures and try to broaden your field of vision. This is true in many ways, but especially in the area of nutrition. That is why today I share a recipe for an Afghan vegetable soup with lentils, following the story of the Afghan Reza, who fled his homeland. The ingredients for this soup were delivered to my house by Marley Spoon, which took a number of special dishes on the menu in December and January of guest chefs from including Syria and Afghanistan. Moreover Marley Spoon 100% of the profits of the food sold at the organization Uber den Tellerrand kochen in Berlin, an organization that provides assistance with integration into a new homeland, by including refugees and local residents to cook together. A laudable initiative, if you ask me. Until January 11 are the courts of the guest chefs on the menu at Marley Spoon. If you do him the opportunity to purchase it can the website.

TIP:
You do not necessarily have to use three kinds of fresh herbs (because: expensive and you have only little of it). The soup is still very nice if you choose one of these herbs and the other two leave out. I myself often some herbal plants in pots stand in my kitchen. That way you stay fresh herbs and you can easily cut a few sprigs. A herb garden in the small, in fact! Both mint and coriander, I so often have in stock. Decide for yourself which herbs you use often or frequently use. Basil and coriander are good plants for 'beginners', as they are almost everywhere nicely. This recipe is good for 2 servings, lunch or light evening meal.

Vegan Afghan vegetable soup (havij) with lentils and fresh herbs

Preparation;

Preheat the oven to determine if you heat the pita breads in it.

Fry the onion, garlic and carrot in a little olive oil in a large pan with a thick offered.

Add a liter of water, together with the chopped tomatoes and lentils.

Bring to taste with curry powder and a hefty pinch of salt and pepper. Let simmer for 15-20 minutes.

Puree the soup after 15-20 minutes very briefly with a hand blender or pour him a moment in a blender. You can also half of the fresh herbs with mashing.

Chop the rest of the herbs coarsely, which you later use as a garnish.

Grate the pita breads cooked in the oven according to package directions (usually about 10-15 minutes at 200 degrees Celsius). I myself pop them too often just in the toaster; faster and at least as good.

Serve the soup with fresh herbs, yogurt and pita sandwiches.

Enjoy!
Vega Dinner
Vegetarian curry with root from the Good Food Book

Vega dinner

You have good (cook) books, you better book, and you have the cookbook. In the latter category covers the Good Food Book; good in all senses of the word. This cookbook contains not only 50 first-rate special recipes from various chefs and foodies (Jonnie Boer, Robert Kranenborg, Yvette van Boven, Ron Blaauw to Herman den Blijker), but also contributes further to a better world. Not because there is a book sold a measly euros will go to a charity or something, but because the entire net proceeds of the sale of the Good Food Book goes to the global action "Zero Hunger! 'World Food Programme (WFP) , part of the United Nations. In short, Good Food Book sold for every 40 children in Malawi nutritious school meal. It might sound like small beer, but that school meal ensures that parents send their children to school instead of letting them work. Look, and that makes for structural improvement.

This recipe, created by chef Dick Middelweerd is enough for four people as evening meal. The Good Food Book costs € 14.95 and is available everywhere (this is the 2nd edition), and include ordering at Bol.com.

INGREDIENTS
Carrot 400 grams
2 centimeters ginger, finely chopped
1 lemongrass stalk, finely chopped
1 red pepper pieces
Lime 1 piece
Lime juice 1-2 tablespoons (or more to taste)
Coconut milk 1 liter
Coriander to taste
Cane sugar 1 tablespoon
Cut the roots (in first peel!) Into cubes of about 2 by 2 centimeters. Fry them gently in a pan in a little oil, about 5 minutes.

Add the ginger, cumin and lemon to the pan. Cut the pepper in half lengthwise and remove the seeds list out. Cut the pepper into small rings and also add to the pan.

Peel the lemon, cut the slices into pieces and also add to the pan.

Then add the cane sugar, a pinch of salt and the lime juice.

Pour the coconut milk last until the roots are below. Preheat be done to the roots and the curry is hot.

Serve with brown rice and some freshly chopped cilantro. Bon appetit!

Tip: If you curry let stand overnight, the next day even better. Really; the flavors of the individual ingredients attract still more in the coconut milk and make the dish even more intense flavor.